
 |
| Figure 1 |
 |
| Figure 2 |
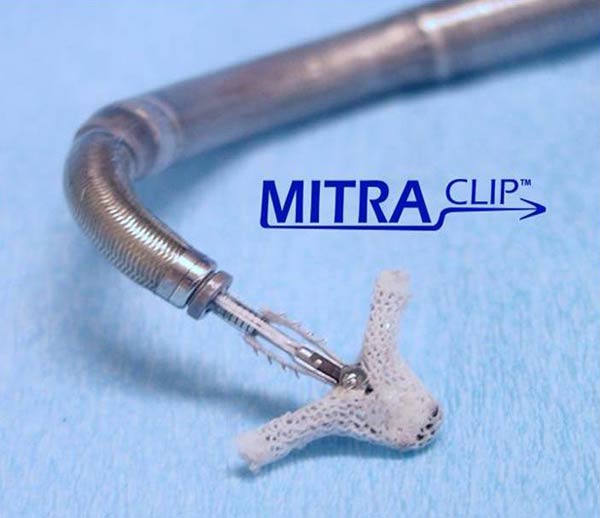
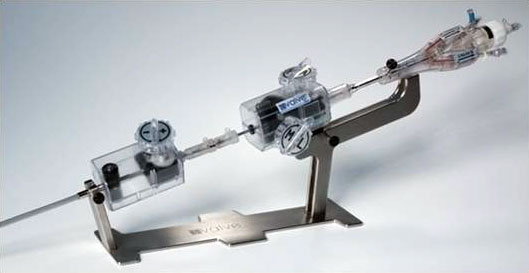
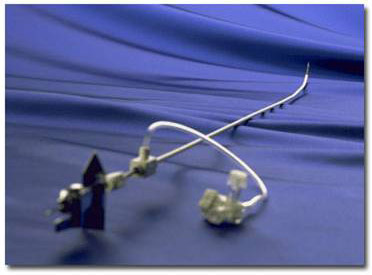
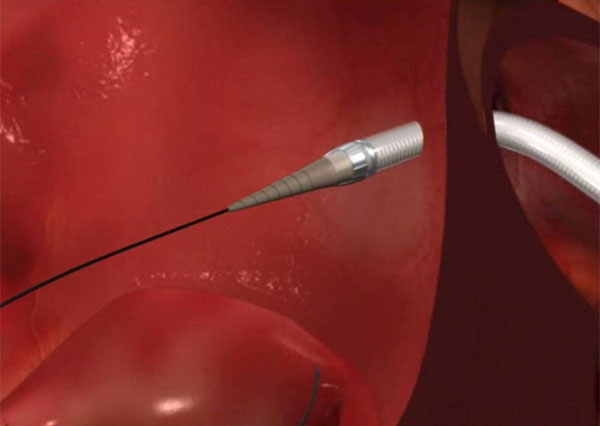
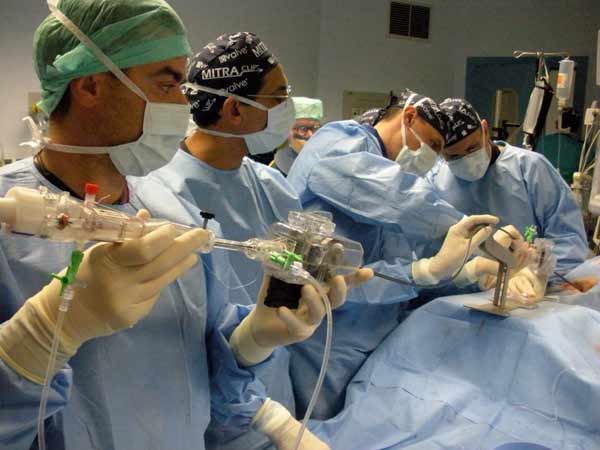
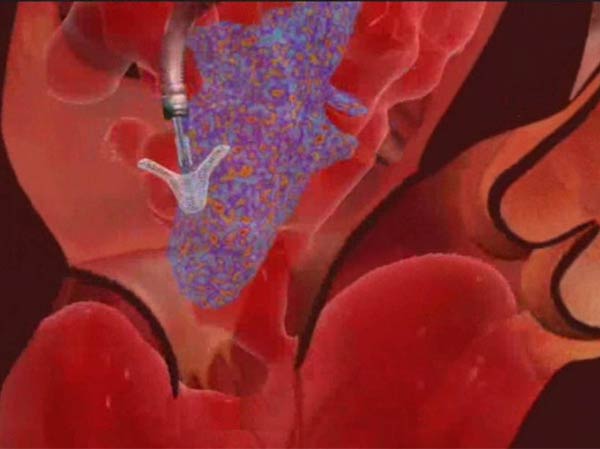
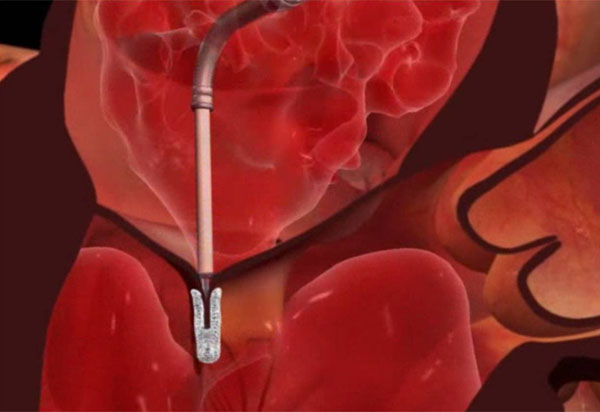
Percutaneous mitral repair using the MitraClip® system (Evalve, Inc., Menlo Park, CA USA) is a method derived from the double orifice open heart surgical technique. According to this technique, mitral regurgitation (MR) is treated by suturing the free edges of the opposing leaflets at the site of regurgitation. The surgical procedure was introduced in clinical practice more than 15 years ago [1], and has proven early efficacy and durability in various anatomic and functional lesions. The MitraClip system reproduces the surgical procedure using a clip to join the opposing leaflets at the location of the MR origin [2]. The system includes the MitraClip device (Figure 1) and a sophisticated delivery system (Figure 2) which is used under echo guidance.
Patient Selection
 |
| Figure 3 |
 |
| Figure 4 |
 |
| Figure 5 |
 |
| Figure 6 |
 |
| Figure 7 |
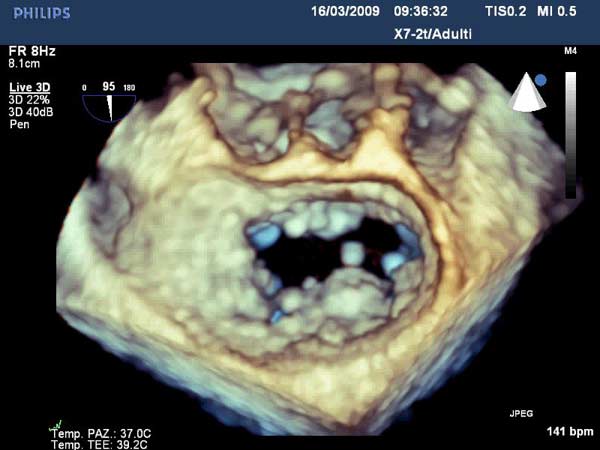
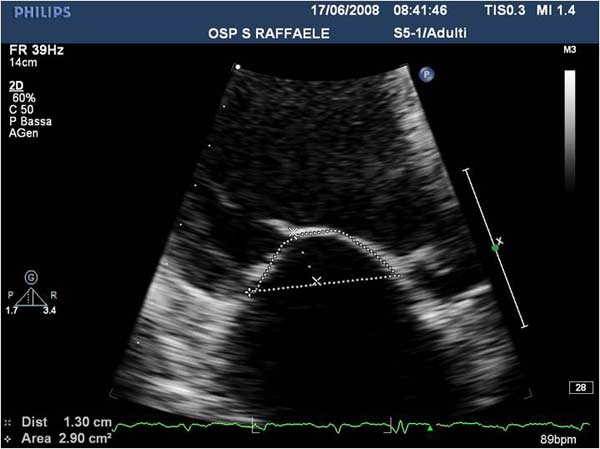
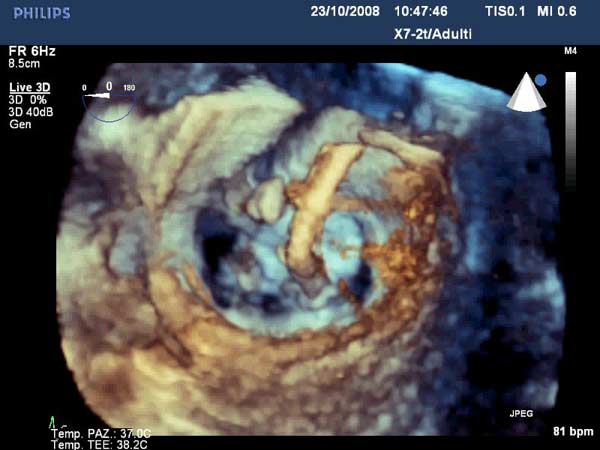
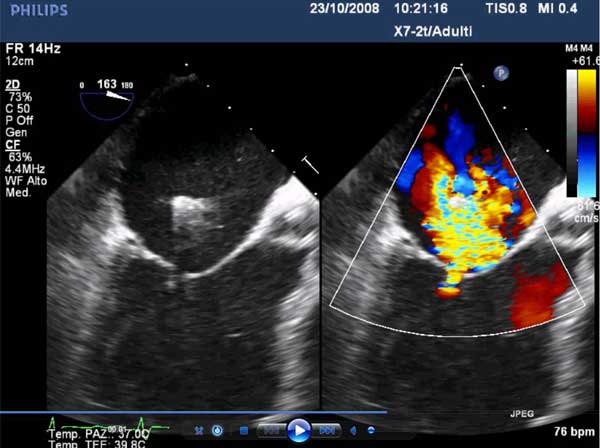
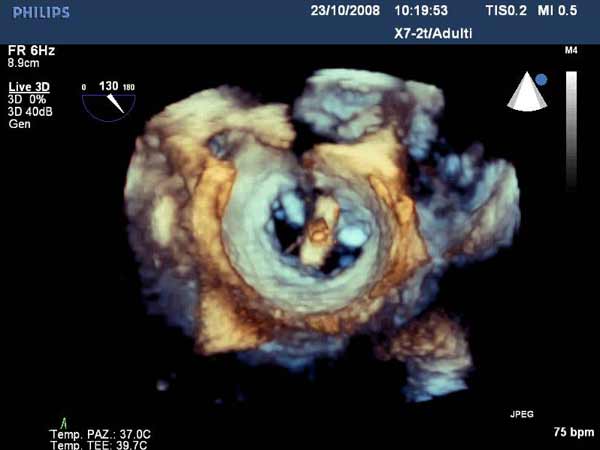
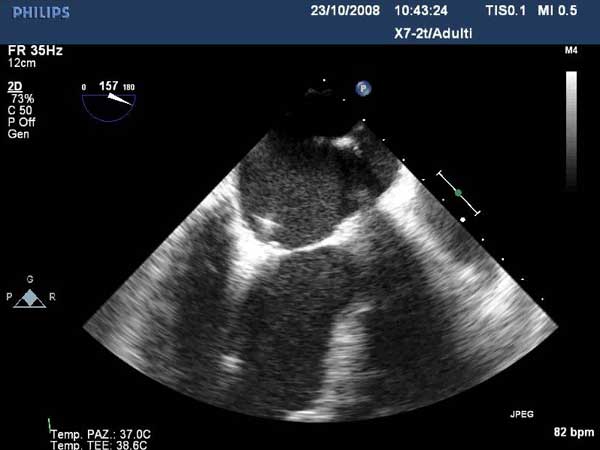
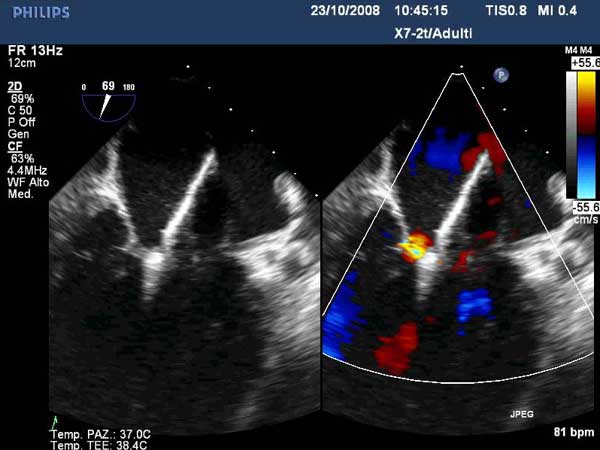
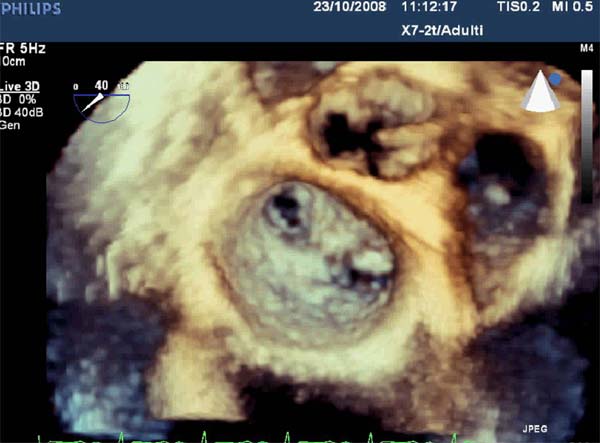
In absence of controlled clinical trial data which are forthcoming from the EVEREST II randomized study, the indications for the MitraClip therapy are currently based on registry experience and will evolve as the technique improves, experience is growing and the data to demonstrate efficacy and safety becomes available. At this time, the best indication for the MitraClip therapy is for symptomatic patients with clinically significant functional or degenerative MR who are at high or increased risk for open heart surgery. From a pure technical standpoint, the procedure so far has only been demonstrated in a subgroup of patients with specific anatomical characteristics which are summarized below and shown in Figure 3. Anatomic suitability is assessed by transesophageal echocardiography, and mitral regurgitation should originate from the central portion of the valve involving the A2-P2 segments, since the device is not ideal to work in the commissures at this time; the mechanism of MR can be either a prolapse/flail or MR due to restricted leaflet motion unrelated to rheumatic disease; the separation between the two leaflets at the site of regurgitation should be limited; severe annular dilatation and/or severe calcification should be absent or is relevant. In case of flail, the flail segment width should be less than 15 mm, and the flail gap less than 10 mm. Figure 4 is a 3D echo image of a patient with posterior leaflet prolapse selected for MitraClip therapy. In case of functional MR, the leaflets should have a minimal residual tissue available for coaptation with the MitraClip device. Figure 5 shows 2D color Doppler jet extension over the coaptation line at TEE short axis transgastric view, while Figure 6 shows the tenting area and the coaptation depth of a patient undergoing MitraClip implant.
Operative Steps
- Prior to the procedure, the patient is prepared in a similar fashion as for an open surgical mitral valve procedure. The patient is anesthetized, kept normothermic and a TEE probe is placed. In our Institution, a live 3D echocardiographic system is used to better guide clip delivery and other steps of the procedure.
- Also prior to sterile draping, a Plexiglas plate and a lift are placed under and over the right lower extremity respectively.
- The right femoral vein and left femoral artery (or right radial artery) and vein or the right internal jugular veins are cannulated for hemodynamic assessment and monitoring with two 6F introducers. A pigtail is placed in the ascending aorta.
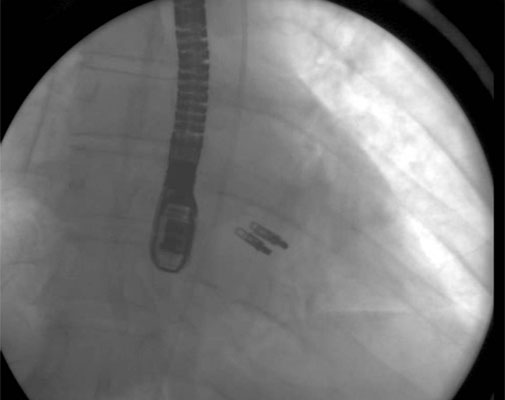
- From the right femoral venous puncture, a TEE guided trans-septal puncture of the septum is performed using a standard transseptal kit (Figure 7) with the Brockenbrough needle, a dilator and a Mullins sheath. The site of the puncture is decided using a standardized approach which optimizes the maneuverability of the delivery system. The puncture is usually high and posterior in the fossa ovalis. After successful septal puncture, the Mullins sheath is parked in the left atrium and the patient is heparinized to achieve an ACT of at least 250 seconds.
- A 260 cm exchange length J-tipped guide (Amplatz ES) wire is inserted into the left atrium and the Mullins sheath is removed.
- The percutaneous femoral vein entry site is dilated with a 16 Fr or 18 Fr dilator.
 |
 |
| Figure 8 | Figure 9 |
- The Steerable Guide Catheter-Dilator assembly is inserted over the guide wire under TEE guidance (Figure 8 and 9). The Steerable Guide Catheter handle is secured in the sterile stabilizer placed on top of the previously placed lift (Figure 10).
 |
 |
| Figure 10 | Figure 11 |
- The dilator and guidewire are removed together and the guide catheter is de-aired.
-

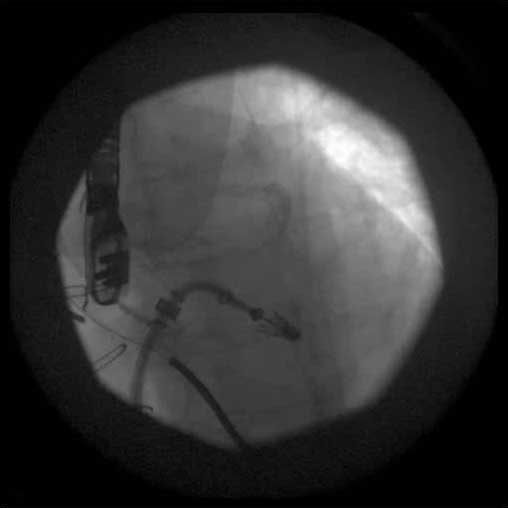
Figure 12 The Clip Delivery System (CDS) is inserted through the Steerable Guide Catheter under fluoroscopic and TEE guidance (Figure 11).
- The Steerable Guide Catheter and Clip Delivery System (CDS) are positioned in the left atrium for clip deployment using echocardiographic and fluoroscopic guidance. The clip arms are opened and the clip is positioned above the origin of the regurgitant jet, with the clip arms perpendicular to the line of coaptation (Figures 12, 13 and 14).
 |
 |
| Figure 13 | Figure 14 |
- After axially aligning the CDS, and the MitraClip® relative to the line of coaptation, the mitral valve leaflets are grasped and the MitraClip® is partially closed to induce coaptation of the leaflets and to reduce MR (Figure 15).
 |
 |
| Figure 15 | Figure 16 |
- Quality of the grasp, valve function and adequacy of repair (reduction of MR) are assessed using echocardiography and fluoroscopy if desired (Figures 16-18). The clip is closed further as needed under real time MR assessment.
 |
 |
| Figure 17 | Figure 18 |
- If necessary, the Clip is repositioned to reduce MR further. When the surgeon determines that an optimal result has been achieved, the clip is deployed and the delivery catheters are removed (Figure 19).
 |
 |
| Figure 19 | Figure 20 |
- A second clip may be placed as needed to further reduce MR (Figure 20).
The steerable guide catheter is removed and groin access is closed with a cutaneous purse string which is left in place for approximately 8 hours and removed thereafter. The patient is recovered from general anesthesia in the appropriate environment. Short-term anti-platelet therapy is required after clip placement (Plavix for 30 days and Aspirin for 6 months). Patient follow-up is similar as after conventional repair.
Preference Card
Echocardiography:
- iE33 Echocardiography System (Philips Electronics N.V. Amsterdam, The Netherlands)
Sheaths:
- 5 and 6F sheath (Terumo 6 Fr x 10 cm Pinnacle Sheath, Product Code RSS602, Terumo Co. Somerset, NJ USA) used for percutaneous access of femoral vein and for the contralateral femoral artery.
Catheters:
- 5F pigtail catheter (5F INFINITI 5fr x 110 cm Pigtail, Catalog Number 534-550S, Cordis Corporation, Johnson Johnson, Warren, NJ, USA) used in the contralateral femoral artery.
Guidewires:
- 0.032” x 145 cm Schneider J-Tip Guide Wire (Boston Scientific Corporation, Natick, MA USA).
- AMPLATZ Super-Stiff 0.035” x 260 cm length x 6 cm Flexible Tip Length (Boston Scientific Corporation, Natick, MA, USA).
- 0.035” diagnostic wire: KIMAL J3FC150035 (AB MEDICA Spa, Lainate, (MI) Italy).
Trans-septal kit:
- 8FR Mullins Trans-septal Sheath (8fr x 59 cm MullinsTM Transseptal Introducer Sheath, Order Number EP008552, Medtronic Inc., Minneapolis, MN USA).
- Adult Brockenbrough Needle (Brockenbrough Curved Needles, 18 gauche shaft, 21 gauge tip x 71 cm, Order Number EP003994, Medtronic Inc., Minneapolis, MN USA).
Dilators:
- Cook 16 or 18 Fr Introducer Set 35 cm (Peel-Away Standard Introducer Sets G04500 or G04501, Order Number C-PLI-16.0-38 or C-PLI-18.0-38, Cook Medical Inc., Bloomington, IN USA)
Tips & Pitfalls
- Proper patient selection is fundamental for the success of the procedure. In open-heart surgery, after valve analysis has been made by the echocardiographer, the cardiac surgeon has the opportunity to double-check the anatomy and identify and assess lesions. In this case, although there is real time efficacy assessment, the therapeutic decision is based solely on echocardiographic and/or angiographic imaging.
- The procedure is mostly performed under echo guidance. The implanting physician has to be highly familiar with echo imaging and with the main imaging planes. Close collaboration between the valve interventionalist and the echocardiographer is mandatory to conduct the procedure safely and efficiently. Live 3D echocardiography is very helpful particularly for clip orientation and alignment on the coaptation line.
- Transseptal puncture is one of the most important steps of the procedure. If transseptal puncture is done in a wrong spot, in addition to potential complications, but also the procedure may become longer due to positioning challenges of the clip delivery system. In particular, passage across patent foramen ovale (PFO) should be always avoided, since in most occasions, a PFO is associated with a tunnel of tissue which impedes free movement of the steerable catheter and usually results in a position that is too inferior and anterior.
- When a first clip has been implanted, the second clip can be easier to implant, since the leaflets are already aligned from the first clip. The valve interventionalist, however, has to weigh the possible benefit of a second clip over the risk related to the additional manipulations on the leaflets, and the remote possibility of dislodging the first clip.
- In case a two clip strategy is determined to be required during the procedure, usually, the first clip is placed on the side of the residual regurgitant orifice.
- Artificial ventilation strongly influences the position of the clip during the respiratory cycle. It is good practice to temporarily halt ventilation during certain fundamental steps of the procedure, particularly while crossing the mitral valve and while grasping the leaflets.
References
- Alfieri O, Maisano F, De Bonis M, et al. The double-orifice technique in mitral valve repair: a simple solution for complex problems. J Thorac Cardiovasc Surg 2001;122:674-81.
- Feldman T, Wasserman HS, Herrmann HC, et al. Percutaneous mitral valve repair using the edge-to-edge technique: six-month results of the EVEREST Phase I Clinical Trial. J Am Coll Cardiol 2005;46:2134-40.


